In this article I will share my view on the DT Swiss Tubeless Ready Rim tape that I used to replace the stock rim tape on my Scott Scale 925 mountain bike, that was damaged around the valve hole in the Syncros X-25 rim.

DT Swiss Tubeless Ready Rim Tape for Syncros X-25 Wheels on Scott Scale
On the DT Swiss product page for the Tubeless Ready Rim Tape you can read:
“The DT Swiss tubeless-ready rim tape also has benefits that make it an indispensable part of the bike workshop. The structure allows for easy mounting via taut placement on the rim profile and with a high fixing glue, it will stay on for a long time.”
There are 9 different widths available of the Tubeless Ready Rim Tape, ranging from 19 mm up to 42 mm. So DT Swiss has got you covered in many disciplines from gravel racing, road racing and mountain biking. The Syncros X-25 rims have an internal width of 25 mm, which results in the 27 mm DT Swiss Tubeless Ready Rim tape with product number TVX2710S29813S.
How to install DT Swiss Tubeless Ready Rim Tape
For me this was the first time installing tubeless ready rim tape on the Syncros X-25 rims. Before installing the rim tape I wanted to gain some good insights and tips from pro mechanics. For reference just have a look at these below:
- YouTube video: “Muc-Off – The only tubeless tape you need and how to install it”
- YouTube video: “David Arthur – How To Fit Tubeless Tyres: Top Tips from a Pro Bike Mechanic”
So there is a lot of good information out there from very very experienced people. I’ve followed the instruction of David Arthur mostly.
- Remove the old tubeless ready rim tape;
- Clean the Syn cros X-25 rim from old glue and tubeless sealant;
- Find the valve hole in the rim and start roughly 1,5-2 spokes before the hole;
- Stretch the DT Swiss Tubeless Ready rim tape so it will go into the ridge of the rim;
- Go with your thumb (and a piece of cloth) over it to push out the air when applying the tape;
- Steps 4 and 5 go hand in hand until you go round 2 times (so 2 layers of rim tape);
- Stop roughly 1,5-2 spokes after the valve hole so this area has gotten some additional protection;
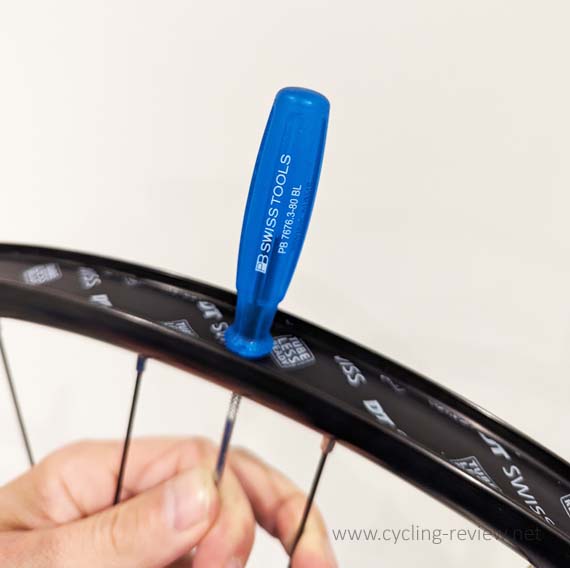
- Pucnh a small hole in the rim tape with PB Swiss Tools Straight Picktool (make sure the diameter is smaller than the valve diameter;
- Install the tubeless valve (for example Peaty’s x Chris King MK2 Tubeless Valves);
And than …
- Install the tire on the Syncros X-25 rim (and wait for the final part of thread)
- Install the amount on tubeless sealant in the tire (for example Silca Ultimate Tubeles Tire Sealant)
- Inflate the tire to around 2.0 bars and off you go !
All in all it is not a super hard process, but you need to get the feeling of stretching in the tubeless rim tape in a good way. Also when doing this for the first time, the feel of having a good enough stretch is hard to judge.

Concluding thoughts and wrap-up
I think it was bad luck with the damaged Syncros Tubeless rim tape, but luckily I had the DT Swiss Tubeless Ready Rim tape in stock to fix it in my garage.
The price point of the DT Swiss Tubeless Ready Rim tape with product number TVX2710S29813S is around the € 18,00, which is until now a good investment after a couple of weeks of riding. For now I don’t have the experience with another tubeless rim tape (brand), but DT Swiss delivers the best hubs on the planet, so the rim tape will be durable as well.
What Tubeless Ready Rim Tape are you using or do you prefer ?
Muc-Off Tubeless Rim Tape on A-Symmetrical DT Swiss RR411 Road Rim is another tubeless rim tape that I’m using. Interested in other quality information from a mechanical engineer on a bike, check out the reviews in these sections.